Introduction

How Crochet Octopi Help NICU Preemies?
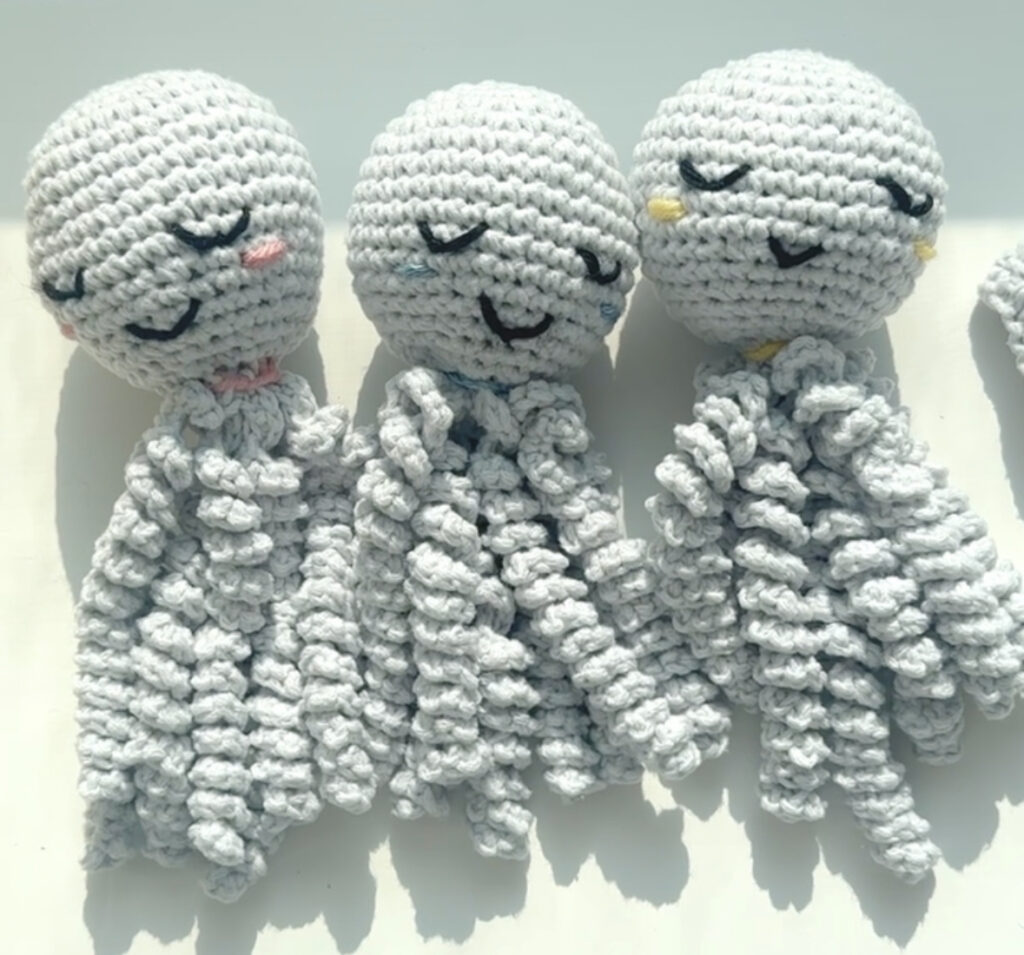
In addition to being plain adorable, these crochet octopi, have been found to provide comfort and therapeutic benefits to premature babies in the neonatal intensive care unit (NICU). The tentacles mimic the shape and feel of the mother’s umbilical cord, which can help calm preemies and reduce their stress levels. The sensory experience of the tentacles also soothes and comforts babies. Additionally, the small size of the octopus makes it easy for tiny preemies to hold onto, promoting their motor skills development. Many NICUs worldwide have implemented crochet octopi and have seen positive results in the well-being and development of premature babies.
Easy Crochet Pattern for Beginners
Crocheting Octopi for NICU Preemies
If you want to donate these as a creative way of volunteering and helping your community, check out the donation requirements of the organization you wish to contribute to. These requirements can often be found on the organization’s website or by contacting them directly if handmade donations aren’t mentioned. For example, I want to donate my octopi to my local children’s hospital. I scoured their website until I found their “donate items” page. Since I couldn’t find requirements for handmade donations anywhere, I contacted their donation department. They got back to me quickly, letting me know they only accept these crochet octopi. You can also mail these to a charity dedicated to these crochet octopi, skipping the step of finding a hospital that will accept them.

Never Use Safety Eyes
Benefits of Crocheting Octopi (octopuses?)

Essential Materials
Yarn
Hooks
Choosing your ideal crochet hook may seem intimidating, but it can be fun. If you’re entirely new to crochet, I recommend starting with the hook on the yarn label and making a few swatches (little rectangles of single crochet) to test your tension, learn the basics, and get consistent enough to make a stuffed animal. I recommend going about 1-2 mm below the hook size on the label for a stuffed animal. Since we don’t want the stuffing poking out from the stitches, we need to crochet tighter. Sizing down your crochet hook is an easy way to do this. To find your ideal crochet hook size, I suggest buying a cheap kit with many sizes and experimenting with those. Once you find a size that works, invest in one of the Boye, Clover, or Susan Bates crochet hooks ($1-3 each).
Yarn/Tapestry Needle
A yarn/tapestry needle will allow us to neatly close up the body of the octopus. It will also let us embroider the eyes, mouth, and cheeks.
Embroidery Thread/Thin Yarn
We will embroider the eyes and mouth using embroidery thread or a thin yarn. Alternatively, you could split a larger yarn to get a thinner strand.
Polyfill Stuffing
The stuffing is going to plush up the octopus, giving it that adorable squishy feeling.

Scissors
Scissors are an absolute need to cut the yarn and trim ends!

Make the Pattern Your Own!
Magic Ring
Single Crochet
Most crocheters begin with a single crochet, which is the first main stitch. We’ll use this basic stitch for this octopus’s entire body and tentacles. Here’s my video tutorial on working single crochets in the round (with a magic ring, as we will do here).
Single Crochet Increases
To increase single crochet, you must single crochet twice in the same stitch from the previous round. Simple, right? As you may have guessed, it’s known as an increase since making two stitches from one stitch in the previous round increases the total stitch count. Here’s my tutorial for this stitch.
Single Crochet Decreases
A single crochet decrease involves crocheting two stitches from the previous round into one. You do this by doing the first loop of a single crochet in two stitches and then bringing the yarn through both loops as in a regular single crochet. A more precise explanation with video is shown here.
Chains
Chains are frequently used to begin projects in the flat. We will use them here to make the base for our cute and curly tentacles! Here’s my tutorial for them.
Slip Stitches
Slip stitches are made just like a single crochet, skipping the first step of yarning over and pulling up a loop. Instead of this step, you insert your hook directly into the stitch from the previous round and pull through. This stitch is super helpful since it barely has any height at all!
Crochet Octopus Written Pattern
Head/Body
Make a magic ring with your crochet hook and yarn.
Round 1: 6 sc into ring (6 st)
Round 2: sc inc in each stitch around (12 st)
Round 3: [sc inc, sc in next st] repeat within [] until end of round (18 st)
Round 4: [sc inc, sc in each of the next 2 st] repeat within [] until end of round (24 st)
Round 5: [sc inc, 1 sc in each of the next 3 st] repeat within [] until end of round (30 st)
Round 6: [sc inc, 1 sc in each of the next 4 st] repeat within [] until end of round (36 st)
Author’s note: If you want to make the head bigger, you can continue increasing by adding more rounds, each time with one extra st in between the 2 sc in next st. If you add more rounds, adjust the head length to make it proportionate. In addition, you’re going to have to change the decreases to start from the reverse of the last round of increases you did (for instance, if you made it to [sc inc, 1 sc in each of the next 6 st], your decreases will begin with [sc dec, 1 sc in each of the next 6 st].
Rounds 7-12: sc in each st around (36 st)
Round 13: [sc dec, 1 sc in each of the next 4 st] repeat within [] until end of round (30 st)
Round 14: [sc dec, 1 sc in each of the next 3 st] repeat within [] until end of round (24 st)
Round 15: [sc dec, 1 sc in each of the next 2 st] repeat within [] until end of round (18 st)
Begin stuffing here.
Round 16: [sc dec, 1 sc in next st] repeat within [] until end of round (12 st)
Stuff fully to desired firmness.
Round 17: [sc dec, 1 sc in next st] repeat within [] until end of round (8 st)
Begin working in the front loops only.
Tentacles & Decoration
Decoration Round: sc 2 in each st around (front loops only), creating a ruffled edge.
Tentacles (work in remaining back loops only)
[ch 41. Sc in the second ch from hook. Sc inc in each chain until back at the body. Sl st in the next st] repeat within [] until you have 8 tentacles and are back at the beginning.
Author’s note: Add or remove chains at the beginning of the tentacles to change their length.

Eye and Mouth Embroidery
You’ll need a yarn needle and some thread for the eye and mouth embroidery. I often split regular yarn into two to generate a thinner, thread-like yarn.
First, thread a 12-inch yarn/thread segment through the yarn needle. (You’re not going to need this much yarn/thread, but it’s always better to be safe than sorry).
Right eye: Insert the needle through the back of the octopus head and poke the needle back out through the rightmost point of the right eye. Then, pull the needle until the end of the yarn is in the stuffing and not visible from the back. Insert your needle three stitches to the right for the leftmost corner of the right eye. Poke the yarn back out from the stitch one down (author’s note: if you want happy eyes, you can go one stitch up instead of down) and in the middle of the two corners. Pull to tighten the yarn slightly, but leave it somewhat loose. Use the needle to make a loop with the yarn connecting the two corners. When poking the needle out from the stitch in the middle, go above the loose yarn and then insert the needle back down below the yarn in the same stitch. This should create a loop that pulls the yarn between the corners into a v-shape resembling sleepy eyes.
Left eye: Poke the needle back out through the rightmost corner of the right eye. Repeat the steps from the right eye to achieve the sleepy v-shaped eye on this side.
Mouth: We will repeat the same steps we used on both eyes. Poke your needle out through the rightmost corner of the mouth (for me, two stitches to the left). Insert the needle in the leftmost corner of the mouth. Next, poke it back up the bottom of the mouth (I used the stitch one down and one to the right). Go back down in the same stitch with the corner-to-corner yarn in the middle, grabbing it and forming a v-shape.
Author’s note: You can create any shape for the eyes and the mouth! Feel free to investigate and experiment with new shapes to make a unique, playful face.
Cheeks (optional)
Thread the yarn you want for the cheek through a yarn needle. Use about 12 inches of yarn to be on the safe side. Insert the yarn from the back of the head through to the rightmost corner of the right side blush. Pull until the yarn disappears from the back into the stuffing. Insert the yarn into the leftmost corner (2 stitches to the right for me).
Author’s note: If the blush is too thin with one strand of yarn, you can poke it back through the rightmost side and insert it through the leftmost side to make another loop, giving you a thicker blush.
Drive the needle through the stuffing until reaching the rightmost side of the left blush. Poke the needle out and insert it back in through the leftmost corner of the left blush (2 stitches to the right for me).
Common Issues
- My tentacles aren’t twisting enough
- Instead of a sc inc in each ch, do 3 sc in each ch and see what happens. Also, twisting them with your finger might help.
More Crochet Patterns and Tutorials
I have a bunch of readily available crochet tutorials up on my TikTok! I always love to help others learn how to crochet, especially if it’s for a good cause. Contact me through social media DMs or loopsofkindness@gmail.com if you have any questions or pattern suggestions. As always, happy crocheting!
More Blogs Written With Love
AP Calc Unit 2 Comprehensive Review Resources
AP Calc AB/BC Unit 3 Review Intro Welcome to the...
Read MoreAP Calc Unit 3 Comprehensive Review Resources
AP Calc AB/BC Unit 3 Review Intro Welcome to the...
Read MoreAP Calc Unit 4 Comprehensive Review Resources
AP Calc AB/BC Unit 4 Review Intro Welcome to the...
Read MoreAP Calc Unit 5 Comprehensive Review Resources
AP Calc AB/BC Unit 5 Review Intro Welcome to the...
Read MoreWritten by Diana Moya Lapeira
As a Costa Rican teen living in Miami, I am passionate about helping others and giving back to my community through fundraising and volunteer work.


